Welcome to our forum. A Message To Our New and Prospective Members . Check out our Forum Rules. Lets keep this forum an enjoyable place to visit.
Currently working on errors from the latest (SimplePress) forum update. Many issues have been resoled and others are being worked on. Thank you for your patience.
 Topic RSS


 (0 votes)
 Member
 Offline
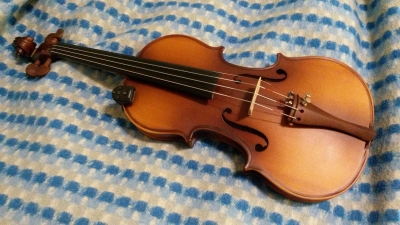
So I thought I would address another issue with my violin. The slightly bent fingerboard. Nothing really wrong with it otherwise but it is after all intended to be straight. Just so there's no confusion I'm not talking about the normal scooped profile of the top of the board but the whole thing being bent.
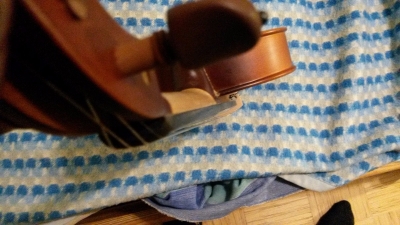
I removed the fingerboard easy enough. Used a smaller hammer and an old thin table knife. And then... I found that the neck has some odd holes in it under the fingerboard.
That's my question. What's up with the holes? Why are they there? Any ideas would be interesting. You can hopefully see it all in the picture below.
Member
 Offline
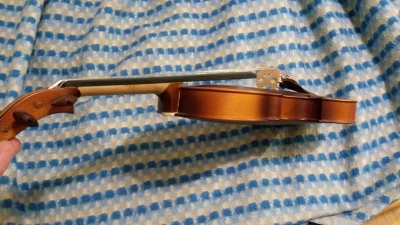
Apparently the finger board was bent to hide the issue with the neck being set poorly. I removed the neck too and found a big mess of glue in the joint. I'm thinking I can just clean off the old glue and reset it and it might end up at the correct angle. Then put on a straight finger board and it should end up perfect.
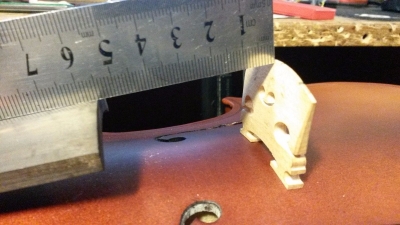
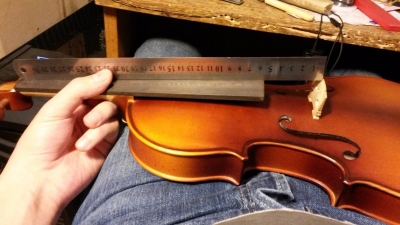
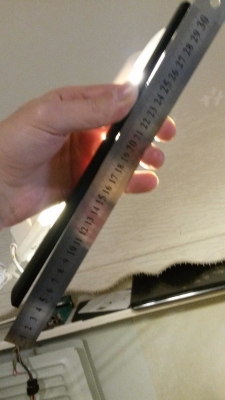
Currently It's dry here. It's winter time and heating dries up the room. 30% humidity or thereabouts. I had already bought a new 3eur finger board from ebay in case I mess up the straightening of the old one. As the neck was, a straight fingerboard projected to a height of about 25mm at the bridge. Considering how dry it is here it should be more like 28mm ish I'm guessing. I'm hoping to get to something like that by cleaning up the glue and setting it in there better.
Hope at least someone gets what I'm describing here. Took a couple of pictures of the glue mess too. The glue is up to 1mm thick at the thickest point.
Member
 Offline
Ain't playin' violin fun?
The holes in the neck look like alignment holes for a jig and maybe to secure the neck while glue dries.
You might consider putting in a thin hardwood shim if the angle is tooooo severe.
But you probably already thought of that.
I had a fingerboard that veered off to the right, so I just sanded it to a more visually acceptable line. It has remained steady for 3 years.
I like your pics.
Onward.
Member
 Offline
cdennyb said
Well, the holes are not of much importance actually, don't understand why they would have them in there.It l;ooks like you understand the geometry of the violin well enough to see what the issue(s) are or were. Good work.
I make fretted fingerboards so i don't worry about building the 'scoop' into the surface as the frets are basically level from nut to bridge. But that's just me and my projects...
I see the straight edge is hitting the bridge just about perfect it seems. The string height will raise them to the correct elevation for your bridge although I suspect some additional fine tuning of the shoulder area will be required as you work the sound it produces.
Excellent to see another not afraid of reaching into the unknown.
I was also thinking the holes should be a byproduct of manufacturing but was still curious.
My understanding of violin geometry is strictly limited to a few google searches and watching some videos on Youtube 😀
Do you make your fret boards completely flat then? From what I know the 'scoop' on violin fingerboards is not very deep either. 1mm at the deepest spot on the G string side and 0.5mm on the E string side.
On the picture you were looking at the strings would be about 2mm from the finger board. I'm thinking I'm gonna aim for 3-4mm since the finger board will likely drop 3mm or so in the summer when humidity is higher. I have another bridge blank so I could try making a "winter bridge" too.
As far as jumping into the unknown. That's where the fun of it is. Not to brag but I'm generally not a complete disaster when it comes to making things with my hands either. The worst thing about violins I feel is how a lot of people are so secretive about how and why they do things and everyone always seems to encourage people not to do anything to their violin.
MrYikes said
Ain't playin' violin fun?
The holes in the neck look like alignment holes for a jig and maybe to secure the neck while glue dries.
You might consider putting in a thin hardwood shim if the angle is tooooo severe.
But you probably already thought of that.
I had a fingerboard that veered off to the right, so I just sanded it to a more visually acceptable line. It has remained steady for 3 years.
I like your pics.
Onward.
I guess it makes sense they would be some alignment holes. And yes, as much as it is fun to play it it's also interesting to have a look inside the belly of the beast. For me the craft might even be somewhat more interesting than playing.
I actually got the old fingerboard somewhat straight now as well. Used a heat gun to heat it and bent it in my hands. I might not even need to put a new finger board on it now.
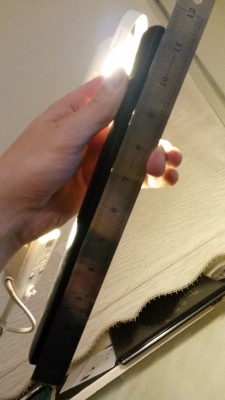
A couple more blurry pics of the original fingerboard before and and after straightening. The title for the topic is also kind of misleading. After all I'm trying to straighten it to not have it bent.
Member
 Offline
Pretty much done for now I think. I ended up making a new bridge for it. I still had a bridge blank from the guy I bought sound post stock in the summer. I should be able to switch back to my original bridge in the summer when the finger board drops down again. We'll see. Maybe I'm gonna end up resetting the neck again to look for a better medium.
I have to play around with the sound post a bit tomorrow and see what the new setup does. So far it seems the A string that used to always be a bit dull has woken up a bit. No wow effect for sure. Hoping for better playability mostly.
I did end up making a couple of very thin wedged birch shims into the neck pocket. Didn't think to take any pictures though. I'm thinking I should have set the neck angle flatter still though. I was too worried that as soon as spring comes and humidity rises the finger board will drop too low again.
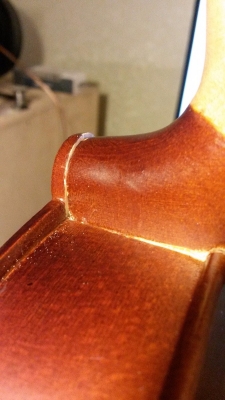
A few blurry pics too. Any suggestions on how to touch up the finish? It's originally a satin finish of some sort.
Member
 Offline
Thanks Pierre! I guess it takes some guts but then again I do feel I have some talent in working with my hands and it does boost some confidence. I would encourage more people to try it. Maybe not on their own played instruments but still if you have any interest at all then try it.
From what I know you have played in Sweden for some time. How did you deal with the humidity changes? I mean the heated dry air in the winter and somewhat humid summers.
And still... any recommendations for touching up the finish? What could match that satin finish and where to get that brown colour? I know nothing about finishing whatsoever so any suggestions would be appreciated.
Member
 Offline
I know this is kind of old, but did you buy this violin new or used? Also, what brand is it? I find it pretty and would love to do some research on it! If you bought this violin old, then the holes may have been from a previous repair that someone had done through the fingerboard by nailing it down. Though I would only imagine it to be one or two nails through the fingerboard, not 5. Somebody could have originally nailed a fingerboard on originally, and then somebody else could have taken the nailed in fingerboard and decided to be a sane person and use a thing called hide glue to glue the fingerboard on. If this violin isn't used and was bought brand new, then it could have been a manufacturing issue like others had stated.
Member
 Offline
They are definitely not nail holes. They are too big and nice for that. 2-3mm if i remember correctly. This is a "bought new" violin. It's from the Thomann Classic Violin Set. There's just a Thomann logo sticker in it. The tailpiece is the Thomann Classic Tailpiece. I like the satin finish it has as opposed to the common glossy finishes.
1 Guest(s)


 Log In
 Register


