Welcome to our forum. A Message To Our New and Prospective Members . Check out our Forum Rules. Lets keep this forum an enjoyable place to visit.
Currently working on errors from the latest (SimplePress) forum update. Many issues have been resoled and others are being worked on. Thank you for your patience.
 Topic RSS


 (1 votes)
 Regulars
 Offline


Hello Folks
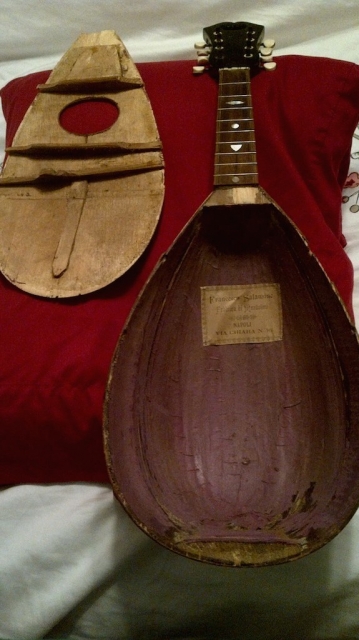
Below you should find a picture of the open mandolin.
I guess I am a bit surprised at how coarse the underside of the top seemed. It is well that I opened the top and was able to look at the seams of the bowl with a strong light behind because there are a few more seams that need attention than were apparent from the outside. I trust that when I re-apply the top to the bowl, hide glue will be in order.
Anyway we are proceeding.
Ray


Honorary advisor
Regulars
 Offline
Regulars
 Offline


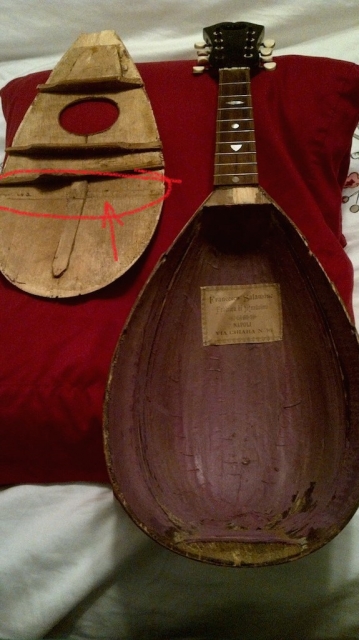
@cdennyb The line you see is the underside of the "cant". The underside of the top is scored across the underside of the top. The heal of the top is bend downward to get an angle behind the bridge. The new centerline is glued and in this case reinforced to prevent splitting. http://www.mandolinluthier.com.....ndex.htm is the site of the luthier I am consulting. He explains that for a period of 40 years the mandolin was THE instrument and they cranked them out as fast as possible. Mine was a lesser builder who didnt use linings weather for cost, time or sonic vibration reasons. "Dave" suggests putting them in for structural reasons.
Ray
Honorary advisor
Regulars
 Offline
Hey Ray ,
I understand Denny's view on repairs but yer luthier's advice is valid as well ...taterbugs are very forgiving in construction technique vs sound / tone production and like many stringed instruments can be fine tuned with string selection ...just sayin'
I do recommend the Ernie Ball lite strings 9 , 13 , 22 , 34 ...also just sayin'
Sooo ...who wants to see more taterbug repair pics ? That's kinda like askin' who wants ice cream .... As far as glue goes ? Yer taterbug ..yer choice ...I'm sure ya know of the three basic gram weight strength indicators fer hide glue vs the qualities of other glues ...do what ya do ....
Regulars
 Offline


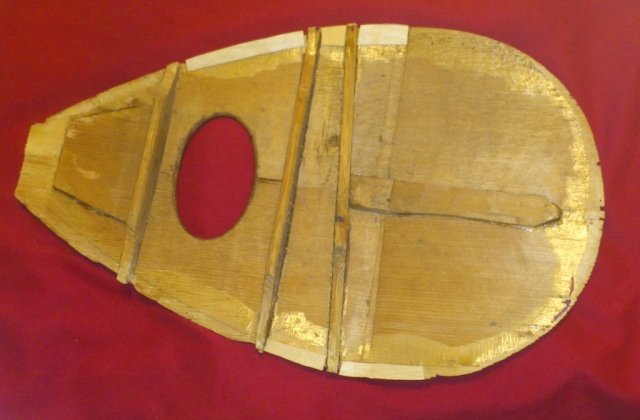
Thanks for looking in Tucs and thanks for your pictures. I note the similarities of construction and the differences. Yours has a reinforcement of the crease in the top, a smaller brace on the centerline. Yours appears to have no reinforcement underside of the neck end. also yours seems have a more definite edge beyond the ends of the braces. I think I will have to use some veneer to create an edge if only to have someplace to glue the edging. I will follow my luthiers advice and use Titebond to fit the top, I have hide glue but it sets up so fast. I will need more time and Tite Bond will give that AND a secure glue job.
Ray
Regulars
 Offline


Honorary tenured advisor
Regulars
 Offline
Ray,
I use Titebond for making native american flutes, it holds really, really well -- perhaps too well? I thought the reason for using hide glue was that later you could take the top off if needed.
A positive attitude may not solve all your problems, but it will annoy enough people to make it worth the effort. ~Herm Albright
Regulars
 Offline


@Uzi, thanks for dropping by. The orthodox position for violin luthiery IS to use hide glue and there seem to be frequent enough repairs to violins to warrant using reversible hide glue in lieu of having a zipper built in. I guess I am a dyed in the wool progressive in these matters. I have repaired two tops / bottoms-off violins using hide glue and it was always a rush getting things in the exactly right place for close up within the setup time of the glue. At 70 yrs of age I don't intend to open this instrument again and I will reassemble it as accurately and skillfully as I am able. Titebond will allow me the time to fit the top, square things up and wrap the elastic strap clamping, multiple times around this oddly shaped instrument in a way that has never been necessary for violins. Besides have you seen the price of some of the fancy clamps for violins. ![]() I was ask on line if I was a luthier and answered no I am just a person too frugal (poor or cheap) to pay someone else to do it. LOL
I was ask on line if I was a luthier and answered no I am just a person too frugal (poor or cheap) to pay someone else to do it. LOL
Ray
Regulars
 Offline


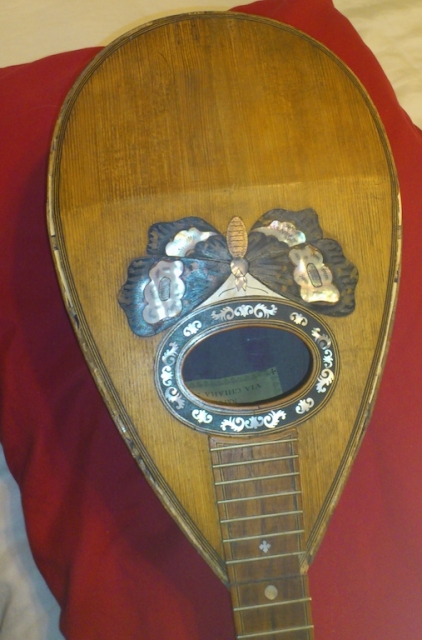
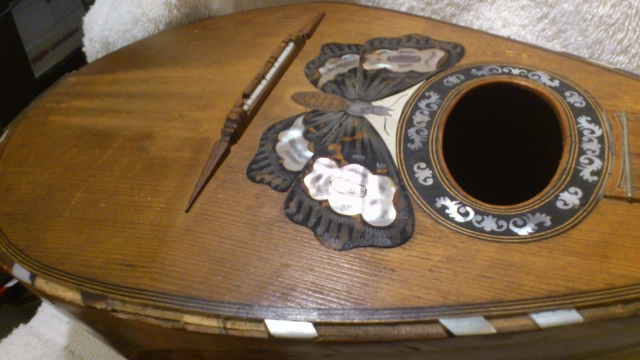
One of the tasks in restoring this mandolin to its former glory is to restore the missing edging.
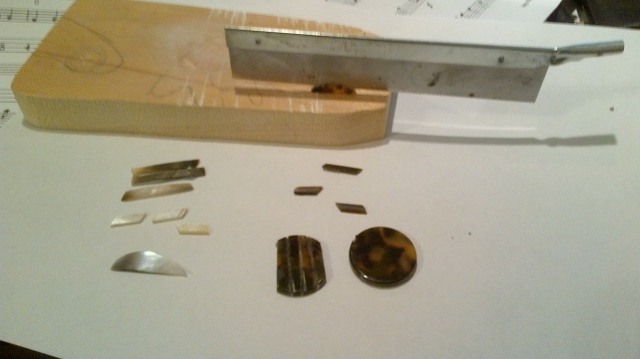
Mother Of Pearl will not be shipped out of the USA and other suppliers want me to buy a sheet larger than the mandolin. Tortoise Shell is prohibited as it should be and again a sheet of artificial celluloid type material is somewhat expensive for the amount I need.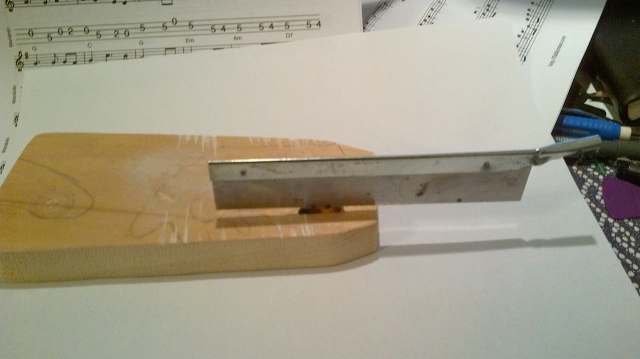

So I have found a source of shell in a beading store for a few dollars and a similar low cost source of 25Cent piece sized fake Tortoise Shell and I am devising ways to cut the material to the sizes I need. You can see my razor saw in position as I double my supply of Fake Tortoise shell by slicing a piece through the middle after cutting a slice off the circle.
The sliced shell and the sliced Tortoise will need to be cut to approximately 4-5 mm in length and the ends beveled so they can fit the curve of the edge. The light and dark pieces with the beveled edges are some of the original MOP and Tortoise Shell edging that will be reinstalled with modern renderings in the remaining spaces. These small tasks help fill the time as I wait for Linings and Rubber bands to arrive from StewMac
OCTAVERAY
Regulars
 Offline


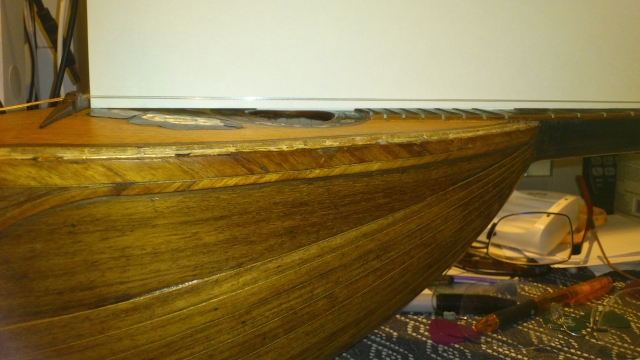
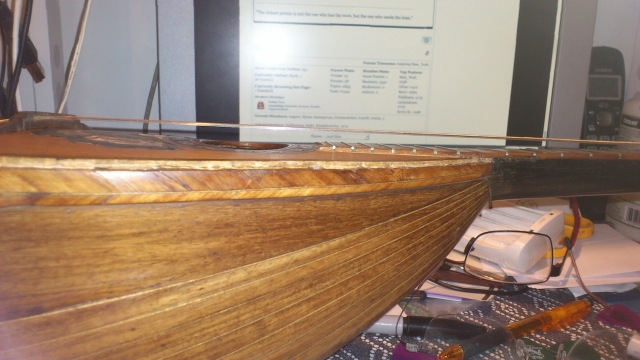
Linings have arrived and been installed so here are some pictures
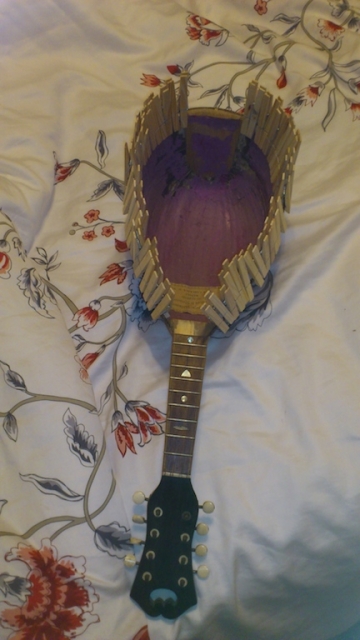
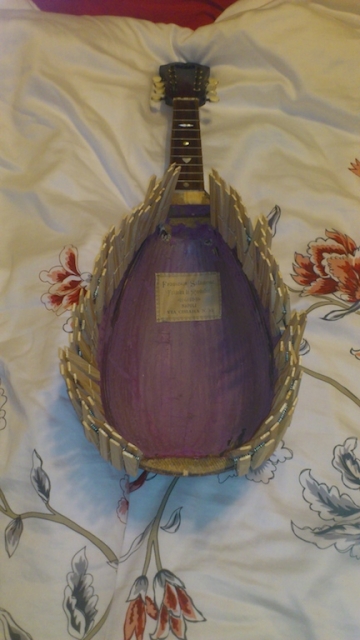
Then after a few hours when the glue is set the high tech clamps are removed.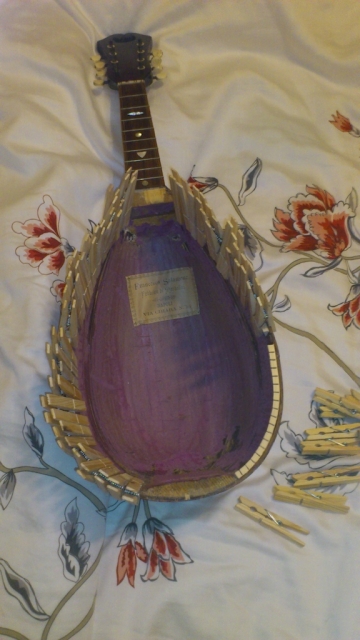

I have also refined my search for edging material and fully engaged my imagination and found celluloid picks at the music store that are fake Mother of Pearl and Tortoise.
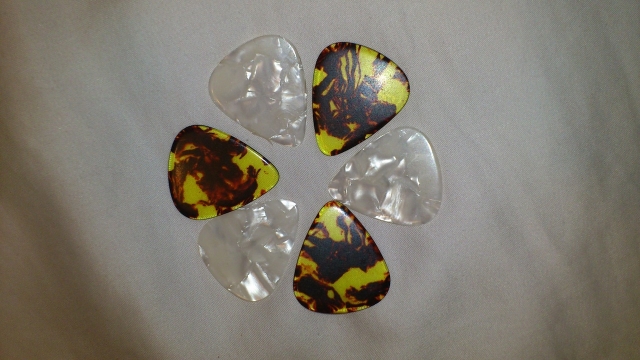
 Stay tuned for final shots of top fitting.
Octave Ray
Regulars
 Offline


http://www.youtube.com/edit?vi.....gioU9XeIlw
My Bowl Back Mandolin is assembled .. The Fingerboard will need to be removed and placed on a graduated shim that will have all strings at all frets needing less than 2mm of depression to sound the note. Presently String height above the frets varies from 1mm at fret 1 to 5.5mm at fret 11 through fret 17. Some pictures below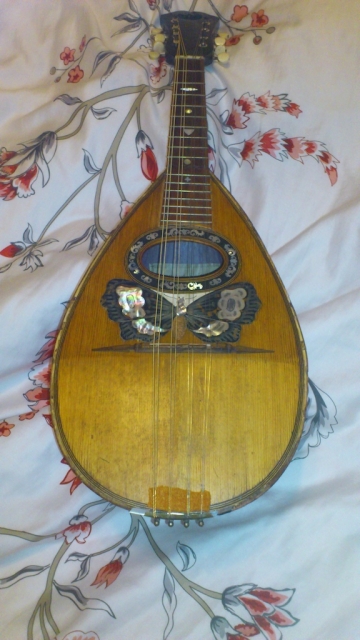

Honorary tenured advisor
Regulars
 Offline
Regulars
 Offline


NEXT EPISODE: Removing the Fingerboard
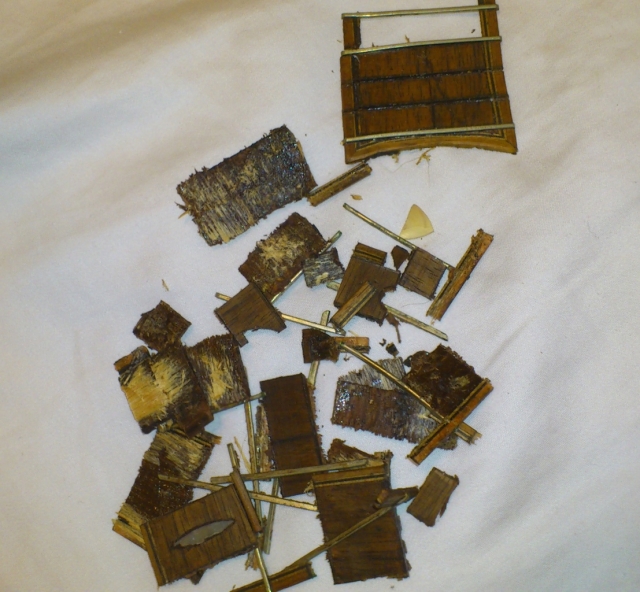
The finger board is off and it did not remain intact, at least 3x as many pieces as the 16 frets. The Finger Board turned out to be less than 2mm thick with a cut about 1mm for each fret wire. A combination of alcohol and heat from a flat iron, softened the glue to ease removal but almost every fret and fret wire came off individually.
Not to worry however, for less than $50, including postage, I will get a new slotted Rosewood mandolin fingerboard, new fret material sized for the slots, and a new bone nut blank. The advertised thickness of the new FB should almost eliminate the need for a shim and leave me with 2mm or less space between strings and frets. I have a local luthier I can call upon for final fret dressing and setup without breaking the bank.
Antique Italian Mandolin Finger board
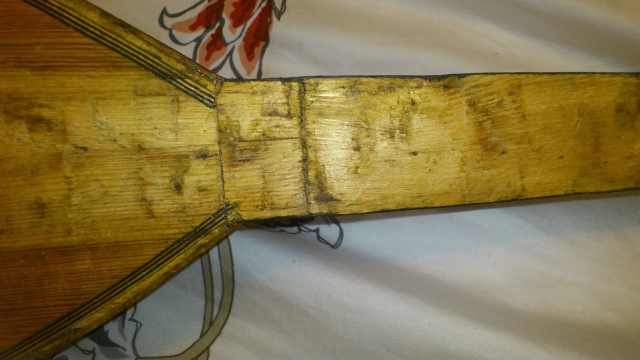
Neck Without Finger Board (See my label inside?)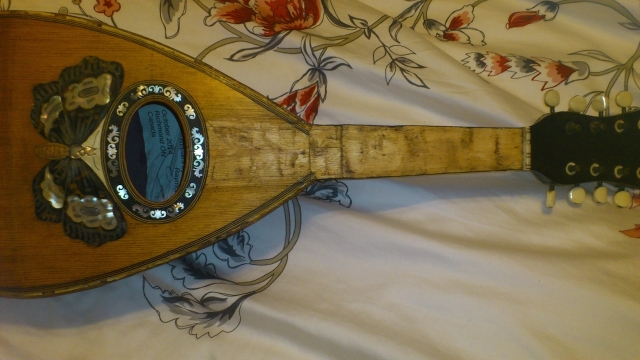

Close-up of neck, notice similarity in the grain of the neck and the top of the mandolin, I think they are both spruce ... maybe a harder wood on the bottom side of the neck but no truss rod in this instrument hence the need for ultra-light strings.
The adventure continues
Octave Ray
1 Guest(s)


 Log In
 Register


