Welcome to our forum. A Message To Our New and Prospective Members . Check out our Forum Rules. Lets keep this forum an enjoyable place to visit.
Currently working on errors from the latest (SimplePress) forum update. Many issues have been resoled and others are being worked on. Thank you for your patience.
 Topic RSS


 (1 votes)
 Honorary advisor
Regulars
 Offline
Regulars
 Offline


Making a NEW BRIDGE:
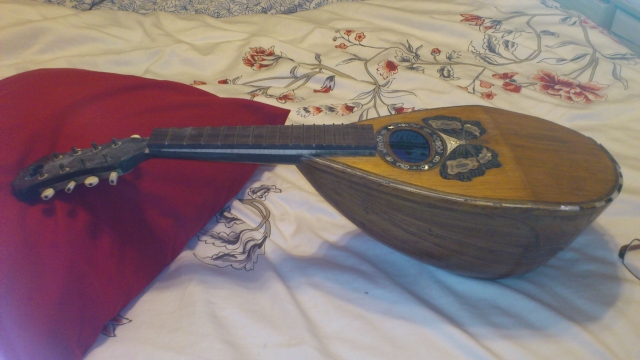
My Luthier Guru "Dave" at this site http://www.mandolinluthier.com.....ndex.htm explained to me that to get best playability at setup, the strings should be no higher than 2mm above the frets throughout the length of the finger board. When I installed the strings with the old FB still in place I got strings at some frets more than 5mm above the frets. Thus the old FB came off and I will be installing a new one where I can better adjust the height above the frets. He also suggested that I might have to fashion a new Bridge that would set string height closer to the top of the mandolin.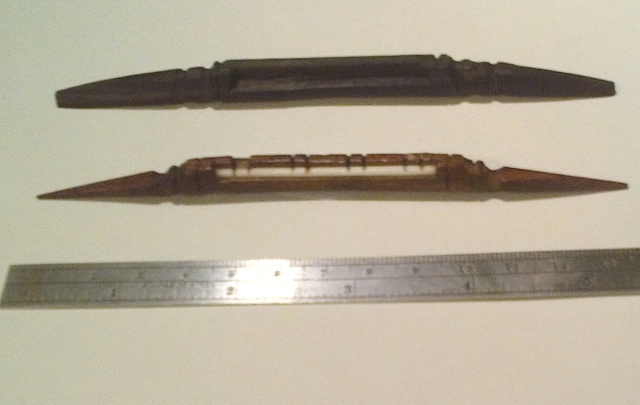

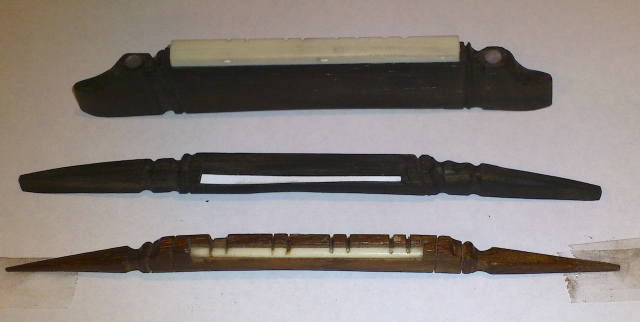
The Ebony Bridge is my new one and while it looks more substantial than the original in Rosewood it does set the shelf for the thin bone strip closer to the Mandolin top by about 1mm. Bone is not installed and final touches and perhaps slimming of some aspects of the bridge await installation of the new fingerboard when heights etc will be optimized for best setup. For all folks deciding to adjust their bridges, Mandolin or Violin .. DO NOT Modify the ORIGINAL ... Get or make a bridge blank and do your adjusting there. If it is a total failure you still have the original. No power tools were used in the fabrication of this bridge and the curve of the underside of the bridge was set by fastening 150 grit sandpaper to the top and sanding the bridge to fit moving back and forth along the length of the top. Actually only 1 cm of back and forth travel but it works. Took about 1/2 a day with interuptions.
Octave Ray
Regulars
 Offline


UPDATE Almost no powertools used so far I have whittled sanded and carved the shim until I glued it in last night. 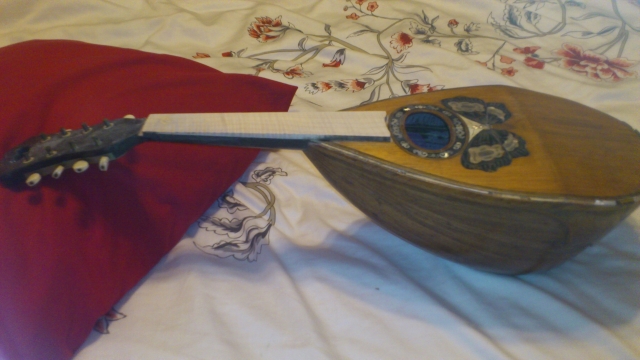

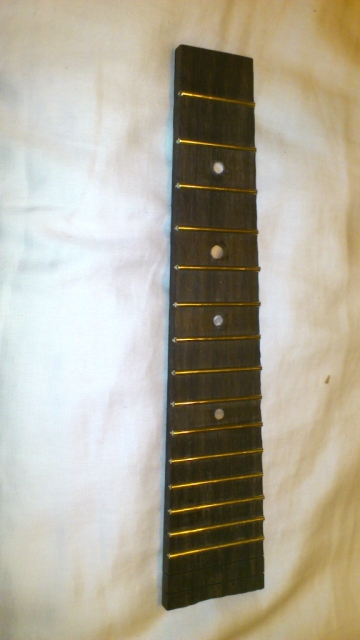
It will need to be coloured like rosewood like the FB which is shown here. Lighting makes them look brass but are bright nickel. 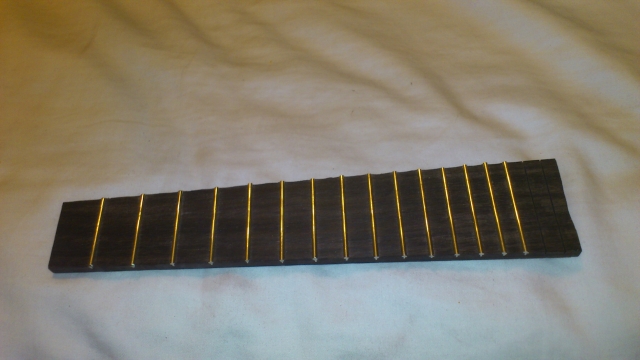

The new Finger Board is only resting on the shimmed neck because I ran out of Fret-wire with just 2 frets to go, expect 2 week wait for materials by airmail (most frugal). As next picture shows nut is a little out of reach so I am thinking of using violin practice and fashioning the nut out of one piece of ebony so it sits in the original nut recess. Might even try Rosewood (nearly as hard). I will probably have to carve a new bridge so whatever the material the nut and bridge will match.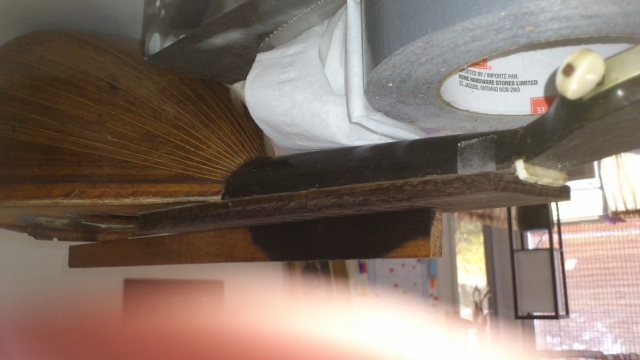

So we are still progressing with no guarantee of a fantastic sounding instrument at the end but the skills being learned means a built from scratch mandola becomes more and more possible.
Octave Ray
Just click on last picture and it will show right side up ![]()


Regulars
 Offline


FEELING DOTTY TODAY
There are 4mm and 5mm position Dots installed. Not as many as on the original but it is a small mandolin. I penciled in a center-line and measured the proper place for the dots, a small triangular blade to set the center point, successive drills, hand spun to set the depth of the dot and some CA (super) glue and they are in, a small file and 00 steel wool and we are done. Presently carving a new nut to match a rosewood bridge which will both be adjusted during final assembly and mounting of strings.
Octave Ray


Regulars
 Offline


I do not know EXACTLY how high the new shim and Fretboard will leave my strings after everything is reassembled so I have carved a couple of bridges while I wait. The bridge in the foreground is the antique original, notice the frugal use of bone to stop the strings at the bridge and note also the small mass of the bridge altogether. The small mass aids the transfer of vibrations into the soundbox of the instrument. Estimating that I will need more height above the top I first carved a bridge of ebony that is similar to the original. A small sliver of paper shows the shelf location in lieu of some bone. This bridge may need to be lightened. The 3rd more massive bridge is different in that the location of the bone or saddle allows the bone to be carved so that this can become a compensated bridge. Compensation is desirable to account for changes in vibration length associated with the guage of the strings. Filing down the bone at its front changes the vibration length of the string so the string plays closer to pitch, especially at higher numbered frets. Compensation is adjusted for proper pitch of the octave at fret 12.
Octave Ray
Members
 Offline


Looks like some excellent work, Ray.. As usual!
"This young wine may have a lot of tannins now, but in 5 or 10 years it is going to be spectacular, despite the fact that right now it tastes like crude oil. You know this is how it is supposed to taste at this stage of development." ~ Itzhak Perlman
Honorary advisor
Regulars
 Offline
Honorary tenured advisor
Regulars
 Offline
Regulars
 Offline


NEARING THE END of this venture. This picture shows the Fretboard being clamped between the neck and a maple board meant to distribute clamp pressure equally over the FB and the neck.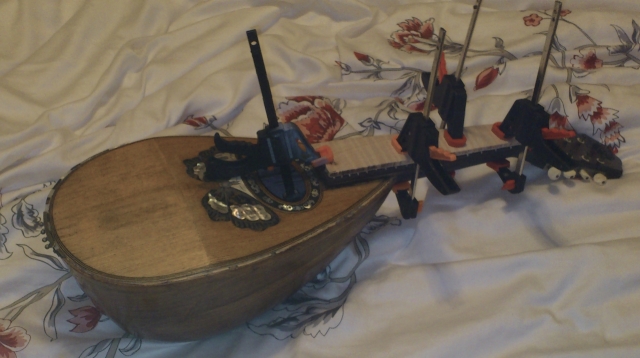

After 24 hrs the clamps were removed and the join inspected. Not the most elegant perhaps but solid and accurately aligned. The nut was installed and after some reduction in the height of the bridge it was fitted to the curve of the top and the strings added. Winding the plain strings is difficult because the tuning posts are straight and the string hole quite large so there is a need to be 3 handed to wind the strings evenly. We miss the polished curved surface of modern tuners where tension causes the string layers to slide upward neatly.
You may notice that I have used the top bridge from the earlier posting. About 1/4 of an inch was removed along with the MOP dots on either side. The Saddle material is a Tusq Saddle mounted on its side. Like a nut, not much material is required to stop vibrations and transfer them to the top via the bridge. Compensation is achieved by adjusting how close or far from the front edge the point where the string touches the saddle actually rests. ------___----___----___----___------.
In this case, so far only the G strings have required any compensation and for them front edge is filed away for about 1.5mm making those strings longer. Intonation is achieved when for instance the E string yields an E an octave higher when the string is plucked while fretted at the 12th fret. No adjustment was needed for the E, A, or D strings but the octave G was sharp, higher than G so the saddle was filed back until the note sounded was G.
Some fine tuning will be required but I like the sound and will be trying to achieve a lighter action to make playing easier... Then I will post a video for you to judge the sound.
Octave Ray
Regulars
 Offline


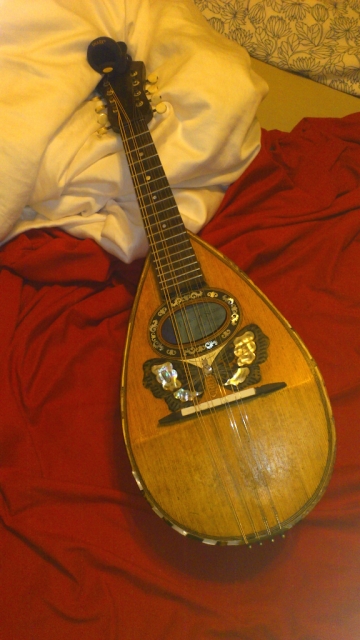
RESTORATION IS COMPLETE ! I have arrived at a servicable combination of bridge and nut. Had ultimately to mount the bone on a 3mm shim but now the intonation is right on and the action is comfortable. Today I settled down and added the decorative edging of artificial Mother of Pearl alternating with artificial Tortoise Shell 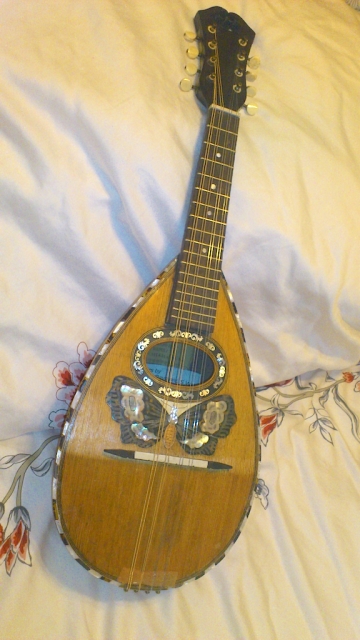

The material for the edging comes from Guitar Picks cut into strips and shaped into the little pieces you see on the edges. Hope everyone has enjoyed this journey and I promise more playing appearances with this little Italian sweetheart.
Octave Ray
Regulars
 Offline


Honorary advisor
Regulars
 Offline
Member
 Offline
@Raywells I know this is an old post, but just yesterday I bought an old bowl-back mandolin on ebay. Looks like maybe it won't need much work, but obviously this is a gamble. Will know more when it arrives.
I used to build custom furniture, long long ago... I was very much inspired by your good work and ingenuity here, and also the helpful link to the mandolin luthier in France.
Thanks so much for taking the trouble to post this!
1 Guest(s)


 Log In
 Register


 ...
...

