Welcome to our forum. A Message To Our New and Prospective Members . Check out our Forum Rules. Lets keep this forum an enjoyable place to visit.
Currently working on errors from the latest (SimplePress) forum update. Many issues have been resoled and others are being worked on. Thank you for your patience.
 Topic RSS


 (0 votes)
  Offline
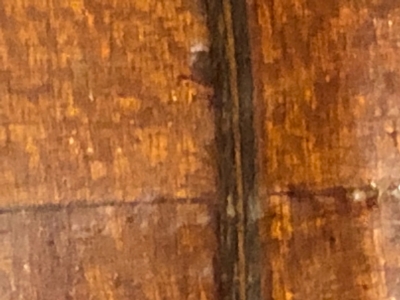

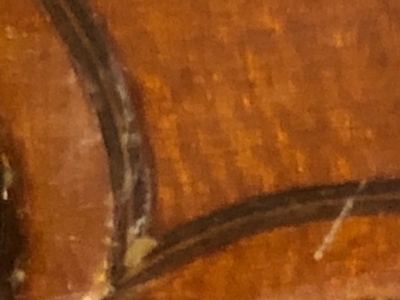

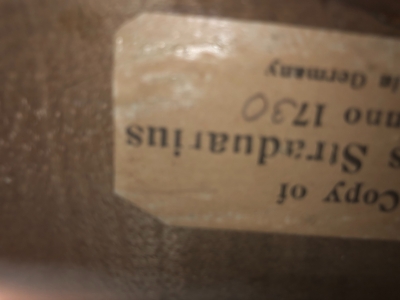

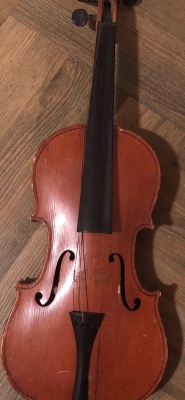
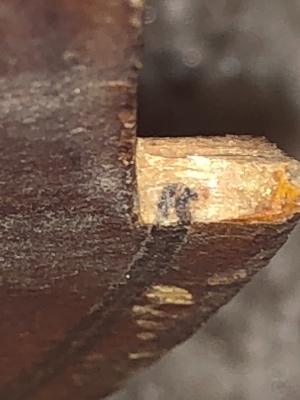
 I’m brand new to the fiddle world, just starting to learn. But I also like to take stuff apart and fix it up. So I bought a “piece of junk” for $8. I’ve read that if the purfling is real, you may actually have something valuable. If this old fiddle is, I don’t want to mess it up. It looks real to me, but i’m A real amateur. The only markings I find are the Stead Copy label. Any opinions?
It looks like a real purfling indeed however this is not an indication of the violin's price (it could range from a few hundred bucks to whatever) and especially not of its sound quality.
Now, chances are that this is not a master violin, but you could end up with a really nice sounding instrument.
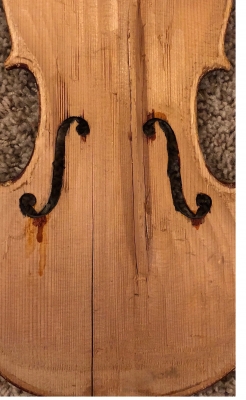
What I would like to point out is that this top crack runs near the soundpost position, so chances are that it will need a soundpost patch - it won't be a usual top plate removal and glueing back together.
If it's your first violin repair, it won't be that easy, but if you are eager to go, visit a local luthier to get some estimates (the value of the instrument if repaired, and the cost of the repairs) so you can decide if you can go diy.
In any case you will need a lot of research, but hopefully we can help in each step 🙂 (after the repair, there comes the bridge, soundpost and setup)
Are there any other major cracks, or open seams?
Oh I did not notice the chip that Pierre said...my bad
Yet, DoSomething410, regardless of the purfling being real or not the instrument could sound really good (on one of my two main instruments there was no real purfling, and I am super happy with the sound, tone etc, and this very violin has been a companion for about twenty years - it is not something common though, as sometimes the existence or not of a real purfling could indicate the amount of time the luthier devoted to the process.)
About the open seam you mentioned, it is not much of a problem if it is where the top meets the lower rib, since you would have to open the violin anyway...
Let us know of what you are about to do, personally I really like to get a glimpse of a process of making a violin sound again, especially when done by the person who are about to play the thing.
 Offline
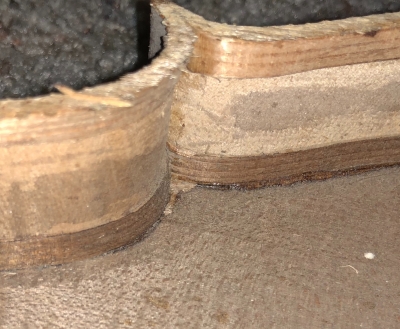
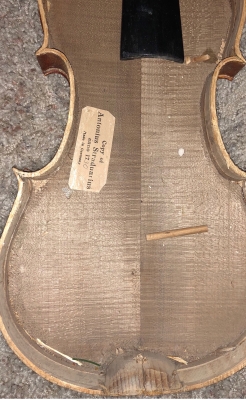
Being the impatient fool I am, I had to dig in. Here is what I found. The top is just gouged out. There is another crack at top center, covered up by the neck. The tail block (can’t remember the terminology right now) is split. The purfling is real. And there are no other markings. I don’t recall seeing any images with the thin strip of wood where the plates meet the ribs, probably just my inexperience.
Usually I am that impatient myself 🙂
Well those pics could side with my initial assumption, that this could be a German factory instrument.
I am telling this, because there are no corner blocks. These are blocks of wood glued inside the corners of the violin, and then the excess material is removed. (You can find many images online, to get the idea). They have roughly the shape of this lighter coloured area, at the left-down corner, near the violin's label . Lack of corner blocks was common in some factory instruments, perhaps to reduce the cost (?)
Anyway, I have seen online many people that did restoration work to similiar violins to yours, make their own corner blocks... (besides everything else, the give some more stability to the whole structure)
Regarding the lower block I would suggest making a new one instead of just gluing it back -but maybe a luthier can say different-, because its existence is fundamental: in its hole, the endpin is snugly inserted and from there begins the tailgut, holding the tailpiece, holding the strings, so lot's of tension going down there...
If you make a new lower block, you should definately think about getting or borrowing a set of peg reamers and peg shavers, because the hole on the lower block is tapered, just like the end pin which goes in it, to ensure a perfect fit (like the pegs in the pegholes, but it should be much more firm).
Now I also see some cracks (?) near the bass bar...If the bass bar is loose...well that's another problem, since you then have to repair any cracks in the top near the bass bar, and then reglue or even refit and reglue the bassbar...or making a new bass bar, because if you glue a crack over a bass bar, you will need some wood cleats and then possibly it would seam reasonable to make a new one, especially if the current bass bar is damaged... (the bass bar should be a perfect fit under the violin top)
Just curious, how did you remove the top?
 Offline
I will plan on putting in the corner blocks as well as replace the lower block. As far as removing the top, I used a sharp, thin, knife and took my time, slowly rotating the knife with light pressure. I started at the bottom where the seem was already separating. I watch a few videos on how to do it. There were a few splinters that come off the top plate. Not being experienced, I don't know if it looks like a poor job, or a good job (I will not be offended by constructive criticism).
I assume my next step would be to clean and glue the cracks back together. Then corner blocks, then post patch?
Thanks for the advice.
For future use, I don't know if you did so already, but I've heard that by heating up a knife, its easier to dissolve/cut through the glue. (Regarding the glue, you should use hide glue, but I believe you have already read about that, it would allow for further repair in the future, among its other advantages...do not use epoxy or something like that)
And how about the bass bar? is it firm in place? Or are these cracks?
Regulars
 Offline

Hello DoSomething 410 (and others). I looked at the pictures about your project and I thought that I might interject some opinions.
First, you might want to look at a Youtube Video by Rosa String Works (209 RSW Part 1 starting at about 16 minutes). He is repairing a crack similar to yours and uses an inexpensive clamping system that may work for you. Although your crack is right over the sound post, I don't think that a patch is necessary (does not look like the sound post damaged the wood by poking through), although I might use Tight Bond glue over hide glue to repair this crack due to the strength of the glue (I would use hide glue when you place the top plate back on the ribs). Hope that this helps.
Success is the progressive realisation of a worthy ideal. —Earl Nightingale.
Regulars
 Offline

Hello again DoSomething410 (and others). I don't think anyone answered your question regarding the bass bar. The bass bar is a reinforcement brace that runs under the bass side of the bridge on the front plate (the sound post is positioned on the treble side of the bridge).
Regarding taking the top plate off the ribs. You don't need anything sharp to do this. A heated thin metal scraper (I use an artist's plaster spatula) will quickly melt the hide glue with a minimum of splintering. You can do the same thing on the tail block and the fingerboard. I heat the spatula by placing it on an electric iron or in a propane flame.
Success is the progressive realisation of a worthy ideal. —Earl Nightingale.
1 Guest(s)


 Log In
 Register


