Welcome to our forum. A Message To Our New and Prospective Members . Check out our Forum Rules. Lets keep this forum an enjoyable place to visit.
Currently working on errors from the latest (SimplePress) forum update. Many issues have been resoled and others are being worked on. Thank you for your patience.
 Topic RSS


 (17 votes)
 Regulars
 Offline

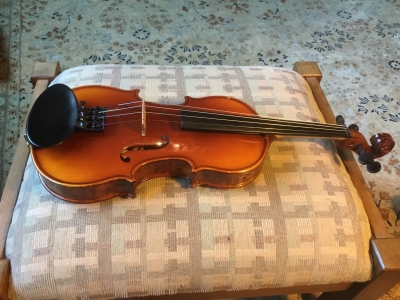
My five year old grandson started kindergarten this fall. The school is teaching the children to play the violin. They initially advised parents against purchasing instruments, but the boy wants one and the school is no longer offering resistance.
Accordingly, I have been tasked with putting together a suitable outfit. The fractional violin is “as new,” but the case is in need of mending, it lacks a bridge so I will need to fit one, I do not like the provided tail piece since it lacks fine tuners, and I think kids should have a chin rest which places the face near the center line of the corpus.
I thought I might as well start a forum topic on it.
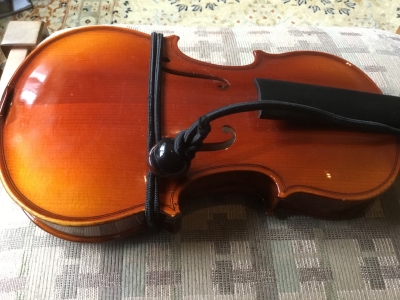
The first task is a glue up of the case damage. Picture of which is below.
Success is the progressive realisation of a worthy ideal. —Earl Nightingale.
Regulars
 Offline


@Irv -
GREAT!
Thank you again, for all the info you've given me so far, especially about the soundpost position.
I think it's time I got mine out, checked it over and put the new Fiddlerman strings on, that I bought a while back.
Five years old seems to be a good time to start exploring music on the fiddle!
I'll definitely be following this thread.
- Emily
Regulars
 Offline

A progress report.
It appears that hide glue was used in the construction of the case. Since the previous owner was likely a child, the separated joint was likely due to malicious intent and not due to a glue failure.
Adhering styrofoam is difficult since the material easily dissolves when in contact with a solvent. I elected to try a urethane glue, held with a grip clamp. It seems well held for now.
The next assignment is making fitting a bridge. I heated the wood for 2 hours at 200F (to remove moisture), wrapped the bridge in an envelope of aluminum foil over newsprint, then roasted for 2 hours at 400F. The aluminum foil excludes oxygen and the newsprint is a sacrificial material to scavenge any oxygen in the tightly sealed envelope.
The feet of the bridge were rough shaped by chisel, then fitted to the top plate by placing sand paper on the plate and rubbing side to side until full contact resulted.
A radius of 42 mm on the top of the bridge is conventional for a 4/4 violin. Since this is a fractional, I used a ratio of back plate lengths to find the new bridge radius of 32.6 mm (42 mm x (28 cm / 36 mm)).
Success is the progressive realisation of a worthy ideal. —Earl Nightingale.
Regulars
 Offline

Success is the progressive realisation of a worthy ideal. —Earl Nightingale.
Regulars
 Offline

Once the bridge feet matched the arch of the top plate, I used a wood pencil to scribe a curve by holding the pencil flat on the fingerboard to the held bridge blank placed in the correct position on the top plate.
I measured the distance of 2.9 mm between the flat surface and the center point of the pencil.
I want a space of 5.5 mm between the g string and the fingerboard, and 3.15 mm between the e string and the fingerboard. This means that my 32.6 mm radius needs to touch 2.6 mm above the pencil line on the g string side and 0.25 mm above the pencil line on the e string side.
Success is the progressive realisation of a worthy ideal. —Earl Nightingale.
Regulars
 Offline

Bridge blanks are too high and too thick when purchased. Height is determined based on projection of fingerboard above top plate (see post in thread above). Once the required curve is created to receive string placement, the rest is easy.
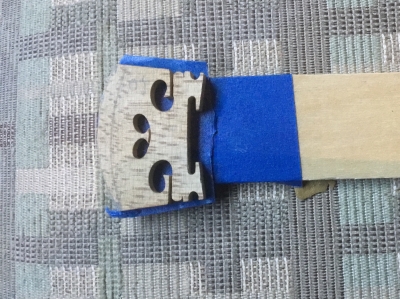
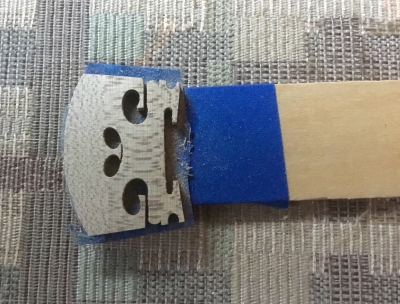
I place blue painters tape on a board (a wood paint stirrer works well) and more tape on the finger board facing surface of the bridge (the side without the maker’s stamp). The two mating tape surfaces are secured with “super” glue (see first photo).
A few seconds on a belt sander will achieve the desired thickness and slope (see second photo). Further lightening can be achieved by expanding and otherwise sharpening the internal features of the bridge, if desired.
EDIT 12/16/2021. Note that the roasted bridge does not change colour when sanded. The effect goes completely through the wood, and changes the sound characteristics. When bounced on a hard surface, a coin like ring is apparent.
Success is the progressive realisation of a worthy ideal. —Earl Nightingale.
Regulars
 Offline

I am likely to get some aspersions about the tail piece selection.
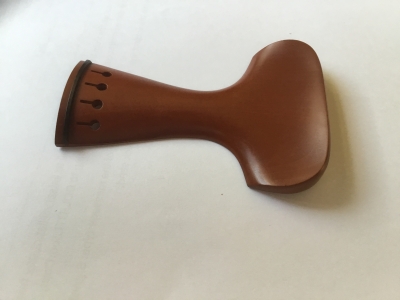
My original choice was a unit that combined the tail piece and chin rest function, as I feel this would be ideal for a young student and would be very robust (see photo). Unfortunately, the ones that I have are too large for this project and I did not think that I could cut it down to fit successfully.
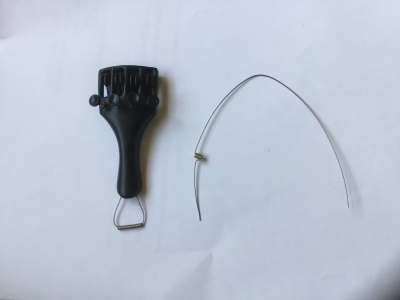
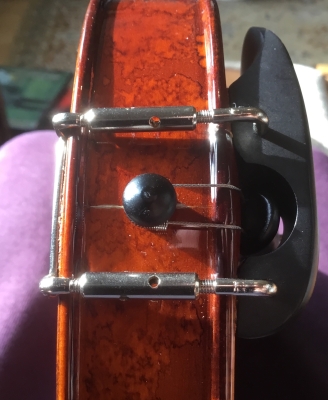
My selected tail piece was manufactured by System Otto Infeld of Wien and is intended to be secured with a thin wire. A short segment of metal tube is used to distribute the load of the twisted wire (see photo).
I utilised a short length of stainless steel cable originally intended as a fishing leader, secured with a crimped ferrule. A stainless steel spring is used as a cushion for the cable around the end pin.
Success is the progressive realisation of a worthy ideal. —Earl Nightingale.


@Irv - we haven't chatted on forum for ages! Good to catch up, hope all goes well there!
Now, that's interesting - the combined "tail-chinrest " - hmmmm... As a fiddler (as distinct from aiming at classical violin playing), in general (aye, not necessarily always, but yes, "generally") I really prefer a center-mount chinrest - especially when playing without a shoulder-rest. Sure, even for me as a "hobbyist" player - there are indeed occasions when I would prefer to somehow rapidly switch-over to a shoulder rest with side-mount chin rest. That partly answers questions I've had like"why do you have several fiddles, you can only play one at a time?" ROFL (not to mention the scordatura tuned fiddle I keep handy !).
On one of the fiddles I fitted with a center-mount chinrest, I had to very marginally grind down the underside of the rest to avoid collision with the tailpiece (well, neither are in any way "special" - just run of the mill, "cheap" items) and the height or lift I wanted on the tailpiece was too little to avoid too-close-for-comfort contact with the tailpiece.
Yeah - thanks for posting this - it's given me some ideas, but I see the immediate downside for "rapid" change-over ( i.e. full re-stringing between changing from integrated tail-chin to "normal" - but I'm now thinking about it on at least one instrument )
Cool....
I seriously recommend not copying my mistakes. D'oh -
Please make your own, different mistakes, and help us all learn :-)
Regulars
 Offline

@BillyG and others.
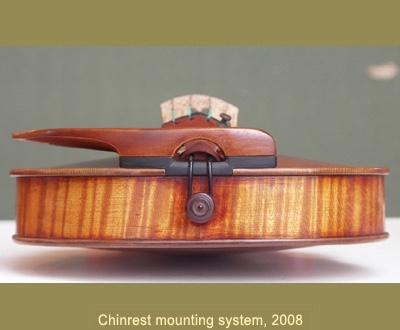
Regarding a quick change chin rest. I have seen a mutant method of chin rest attachment using two carbon fibre rods inserted via holes bored through the top plate and end block. I don’t see a reason why a similar insertion could not be made with a small block held on with a conventional chin rest retaining hardware (often used for the securement of a violin microphone jack). A couple of magnets could be enlisted to keep the pins in place.
To the original build, it seems to me that keeping the chin centred over the violin corpus would benefit bowing with short arms. I like to design based on exploiting first principles.
Success is the progressive realisation of a worthy ideal. —Earl Nightingale.
Regulars
 Offline

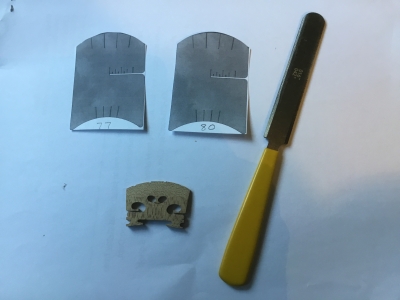
I have a template for string knotching the bridge, but it is for a 4/4 violin. Since mine is a fractional, I made a 0.77 (the proper one) and 0.8 reductions of the template on my copier. Since I like the strings to spread as much as possible on the fingerboard, I elected to use the 0.8 version of the template.
I used a guitar nut file to actually make the knotches.
Success is the progressive realisation of a worthy ideal. —Earl Nightingale.
Regulars
 Offline

Regulars
 Offline


Regulars
 Offline


Regulars
 Offline

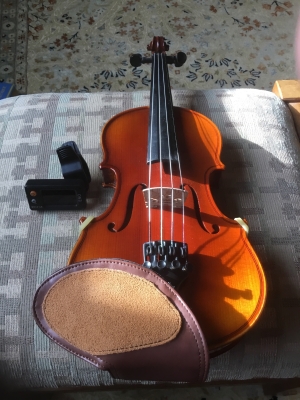
The school teacher liked my chin rest idea, but wanted it changed back to “original” since she wanted the home instrument to be similar to the school instrument. This allowed me to provide a leather combination chin rest pad and shoulder rest (see photos).
I threw a small electronic tuner in the case.
The nut was too high and I filed it down (likely cause of original owner’s disaffection with it).
The sound post was very close to the bridge. I tried moving it around but it sounded best at the original location. It is a pleasant sounding violin with the original synthetic core strings.
Success is the progressive realisation of a worthy ideal. —Earl Nightingale.
Regulars
 Offline

Success is the progressive realisation of a worthy ideal. —Earl Nightingale.
Regulars
 Offline

Success is the progressive realisation of a worthy ideal. —Earl Nightingale.
Regulars
 Offline

@BillyG and others.
I spent some time looking through my image file and found what I was talking about. I think it would be relatively easy to make a non invasive quick mount arrangement of this idea. See pictures below.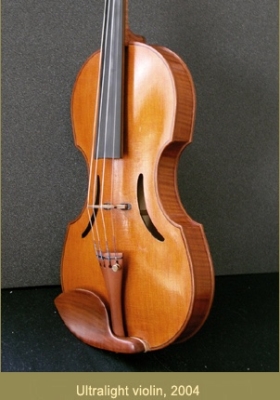
Success is the progressive realisation of a worthy ideal. —Earl Nightingale.
Regulars
 Offline

Grand son received fiddle last night.
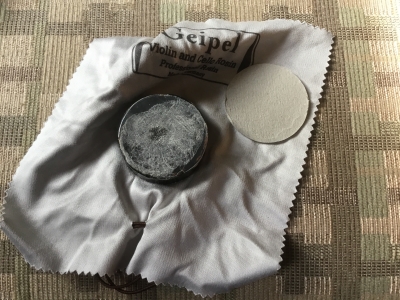
The rosin was an immediate hit. “Two swipes and I have sound.”
He did not like the bow retaining latch by the frog, since it was difficult to remove the bow without catching hair. I never liked that mechanism myself. Fiedler makes a wonderful bow retainer using magnets for something the size of a cello, but nothing for smaller instruments. Bummer.
Success is the progressive realisation of a worthy ideal. —Earl Nightingale.
1 Guest(s)


 Log In
 Register


