Welcome to our forum. A Message To Our New and Prospective Members . Check out our Forum Rules. Lets keep this forum an enjoyable place to visit.
Currently working on errors from the latest (SimplePress) forum update. Many issues have been resoled and others are being worked on. Thank you for your patience.
 Topic RSS


 (0 votes)
 Honorary advisor
Regulars
Last year, I bought violin pegs from Fiddlershop.com, or I thought I bought violin pegs from Fiddlershop, anyway.
The first thing I noticed is that these new pegs were larger than expected, and the shape of the wide ends were a little different than the existing violin pegs I was replacing.
This did not matter to me though, but the size of the new pegs made for a heck of a lot of sanding to get them down to the right size. Hours and hours of sanding, actually.
I ended up with perfectly fitting pegs, that have now been cut to the right length, and I am just waiting for the right size drill bit to arrive in the mail to finish the peg job.
Then I was reading a review of someones product, and whoever it was was ranting because they had sent him viola pegs instead of violin pegs, and he knew the difference.
Hmmm. That got me thinking. Are those odd shaped violin pegs actually viola pegs?
Too late to do anything about it now though.
Since this was my first, test run, at fitting pegs, I will just chalk this up as an interesting experience. The violin I fitted the pegs to is my cheapest violin, and I plan to try a different set of pegs, and other fittings on it at some point.
This is not a rant. But I am curious, just how much time might I have saved if I had bought, and received, violin pegs?
MACJR
Honorary advisor
Regulars
Fiddlerman said
LOL - I hope not MACJR
I also doubt it. Pegs are not fitted and they are not intended to be sanded to the right size. New pegs are very wide and must be shaved with a peg shaver or you ream the whole with the matching reamer.
I understand that these tools are expensive and don't expect you to purchase them for a one time job.
The reason pegs are wider is that there are so many different hole dimensions plus holes tend to expand over time. It's safer to make them thicker.
Looking over the Fiddlershop peg offerings, these were the French model pegs. They are only listed in the violin accessories area, and there are no ebony pegs listed in the viola pages, so these are violin pegs.
They are more robust than the pegs that came with the violin I am working on, or the pegs of my other violin, and they look like the pegs used on some violas I have looked at, but this is not a big deal to me. It was a good learning experience.
As for sanding down the pegs, I chose this method because I wanted smoother looking pegs. I had seen images of pegs that had been shaved, and sometimes this process leaves rough looking pegs. I do plan to by a peg shaver at some point though. It sure would save some time. 😉
I actually finishes sanding the pegs down to size about June of last year, but then set this project aside until the other day. I finally cut the pegs to length, to fit flush with the peg box (thus doing a better job than whoever fit the original pegs to this violin), and now just need a 2mm drill bit to drill the string holes and finish this job.
I am not actually complaining about anything here. It has all been fun.
MACJR
Honorary advisor
Regulars
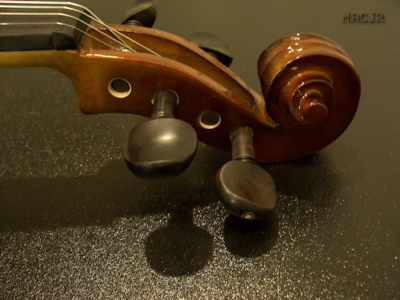

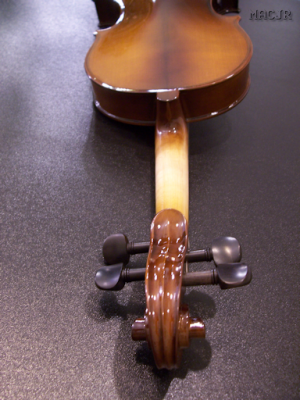
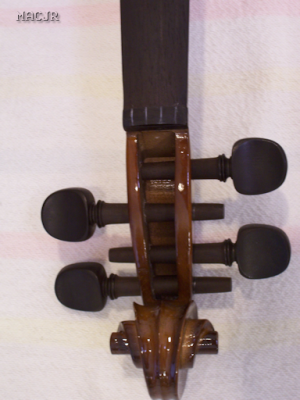
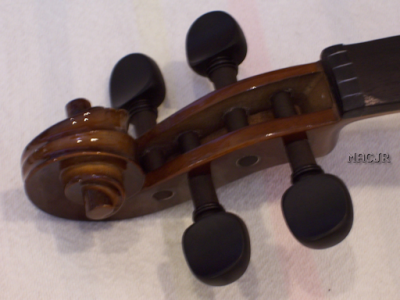
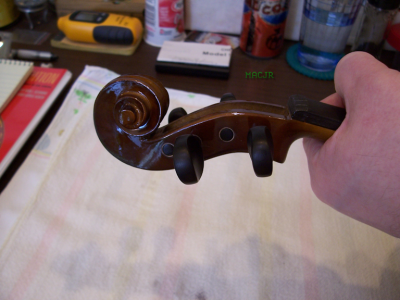
 I thought I might as well add some pictures.
The first two are from before I started work on the pegs.
The second two, with the light backgrounds, are the with the new pegs. The third picture is with one of four pegs cut to length, and the last picture shows that all pegs are cut to a flush fit.
Unfortunately, I did not think to notice that I had grabbed the shortest peg to use as a guide/template, to sand my new pegs down to match.
I could have saved a lot of sanding if I had gone for a more standard peg length.
Update to note that this is a cheap Cecilio CVN-EAV violin. I bought this to be used as a backup violin, and to learn and practice luthier skills with.
MACJR
Honorary advisor
Regulars
Fiddlerman said
No worries even if you were complaining. 🙂 I didn't take it that way in any case. Just trying to say in my clumsy way, that I doubt that we send you viola pegs and that they are always thick before shaving/sanding. 🙂
I have now seen pegs sold as viola pegs, that look just like Fiddlershop French Style Violin Pegs. They look the same, but without measurements, there is no way to be sure they are exactly the same as the French style violin pegs Fiddlershop sells.
However, as you point out, Fiddlerman, it is best to get new, unfitted pegs that are over-sized so that they can be shaved, and/or sanded, down to the correct size for the violin being worked on. If a violin has large peg holes, some off-the-shelf violin pegs, sold elsewhere online, might arrive too small, especially if they have been pre-shaved to an assumed correct 4/4 size.
One bonus of getting over-sized pegs is that I ended up with a pile of ebony dust. I needed some ebony dust for work I want to do on one of my other violins. It has improperly spaced nut string grooves. I want to try that fill the grooves with ebony dust and black super glue method, and then cut in new, properly spaced, grooves.
I bought a spare nut just in case that does not work out well. 😉
MACJR
Regulars
 Offline

Hi MACJR (and others). I attempted to sand down boxwood pegs using a jig (seen on Youtube) where you used a peg box reamer to shape a hole between two pieces of wood held together with a door hinge, and inserted the peg sandwiched in a piece of sand paper. It did work and retained the proper taper, but boy was the process slow. Life is too short to mess with that process.
I then got a Zuzek Tools violin peg shaver and I am very pleased with the results. I found that for best results you hold the shaver with the adjustment knob pointing down toward the floor and you need to take care with the ring (larger side) end of the peg or you will shave off the decorative rings.
The finish produced by the shaver is extremely smooth (I have used boxwood, redwood, maple and ebony thus far) and the slope can be adjust to match any peg box reamer to get an exact fit (mine was perfectly matched as it came from the factory). A little pricey at $75 but it is well made and should last a lifetime. Replacement blades are available but it looks to be possible to sharpen the blade as necessary with a diamond hone or similar.
Success is the progressive realisation of a worthy ideal. —Earl Nightingale.
Honorary advisor
Regulars
Hello Irv. Sorry for the delay, I was off doing a workout and then getting lunch started. Then testing out my new drill bit, that came with a hand drill. I only needed the bit but thought I would see how well the hand drill worked. It works surprisingly well, so now I am set to drill those violin peg string holes, after lunch (which is in the oven now).
I have looked at a few peg shavers, and they are in about the same price range you are talking about. I will take a look at the one you mention though. A reamer and a peg shaver are both on my tools get list.
So far, I have only worked with ebony pegs, but want to try rosewood pegs next.
Yeah, sanding pegs down, all the way from raw to finished, does take a heck of a lot of time, especially with ebony pegs. Much harder wood than I am used to working with.
I just used strips of sandpaper, three different grades, from rough to fine. Making a tube shape of the sandpaper, and being careful to maintain the correct shape, and testing the fit many times along the way.
I also found that I did have to be careful with those decorative rings you talk about. On the first peg, there was some definition lost, but I caught it in time not to make it too noticeable.
MACJR
Regulars
 Offline

Hi again MACJR (and others). I have been changing over several violins from standard pegs to the Knilling Perfection pegs, and I was having a hard time getting the end of the peg exactly flush with the peg box with a square edge. The trick that I found that works well is to bore a hole in a small piece of wood, ream the hole with a peg reamer, and insert the peg into the piece of wood. I then cut the peg in a small hobby chop saw that has a built in vice (I use a Proxxon, which is a little expensive, but you could use something like the Harbor Freight unit as well). I was using a fine tooth metal blade, which works well with the plastic ended Knilling pegs, but burns the wood of a regular peg. I now use a Harbor Freight carbide tip wood blade (about 3 inch diameter) for wood pegs. Perfect 90 degree ends with no chips. This makes a much smoother cut than you can get with a hand saw.
Success is the progressive realisation of a worthy ideal. —Earl Nightingale.
Honorary advisor
Regulars
Irv said
Hi again MACJR (and others). I have been changing over several violins from standard pegs to the Knilling Perfection pegs, and I was having a hard time getting the end of the peg exactly flush with the peg box with a square edge. The trick that I found that works well is to bore a hole in a small piece of wood, ream the hole with a peg reamer, and insert the peg into the piece of wood. I then cut the peg in a small hobby chop saw that has a built in vice (I use a Proxxon, which is a little expensive, but you could use something like the Harbor Freight unit as well). I was using a fine tooth metal blade, which works well with the plastic ended Knilling pegs, but burns the wood of a regular peg. I now use a Harbor Freight carbide tip wood blade (about 3 inch diameter) for wood pegs. Perfect 90 degree ends with no chips. This makes a much smoother cut than you can get with a hand saw.
I am considering trying the Knilling Perfection Pegs at some point. I am not fond of the idea of using plastic rather than wood pegs though. However, having pegs with gears, would be nice. I so much like tuning a guitar better than tuning a wood peg violin. Tuning the guitar is so much easier.
The one problem I would run into with reaming a hole into a piece of wood, with a reamer, and then trimming the pegs flush with that is that I have found that the violin I am working on does not have 90 degree sides, they taper to a narrower bottom of the begbox. Any pegs at a 90 angle will not be flush with the peg box.
Worse, if I taper the ends to match the violins peg angle, that would only be flush as long as you never turn the peg from that position. Maybe that is why Cecilio does not even try to make their pegs flush with the peg box, but instead has them inset some.
I am thinking about trying something else, that I happened to see today. Someone had rounded the peg ends, so that the rounded end part sticks out a bit. That looked nice, to me. It is too late to try that with these pegs, but I can round them a touch, and in time, when the pegs work their way out of the peg box more, I can round them more.
You clearly have more experience with this type of work, and I like reading your suggestions and tips.
Thank you, Irv.
MACJR
Honorary advisor
Regulars
I took some time to file and sand the end of the pegs to round them a touch. I think it looks better this way.
The used bee's wax to both lube and polish the pegs, and then I strung on those Fiddlerman Strings I bought last year for this violin.
Just from doing a short practice set of scales, I can tell this violin sounds better than it did with the steel strings it had on it before. I will do a full practice session with this violin in a couple hours.
So far, everything seems to have worked out okay. If I were to start this project over again, I would do two or three things differently, but these new ebony pegs do the job.
MACJR
Honorary advisor
Regulars
Oh! I like those Fiddlerman strings.
Sweat sound. They are better than Pirastro Tonica strings. At least I think so.
My cheapest violin now sounds better than my best one, that has Tonica strings.
Some of the work I did, to improve the bridge thickness, and fit new pegs, may have helped some, but those strings are nice.
MACJR
Honorary advisor
Regulars
Okay, the wood tone is still better in the Cecilio CVN-500, than it is for the Cecilio CVN-EAV, but those Fiddlerman strings definitely made for a huge improvement for the sound of that cheaper violin.
I will have to see if Fiddlerman strings make my CVN-500 sound better too.
It also helps that my playing has been getting better lately too.
MACJR
Honorary advisor
Regulars
Fiddlerman said
Thanks for the nice words on the Fiddlerman Strings. 🙂
No problem. Now if I can just keep the bridge from slipping out of place on a too thickly coated varnish surface, so that those strings always sound their best. 😉
I think a future project for that cheap Cecilio CVN-EAV, is to strip off its varnish and put something less slippery on it.
Thick varnish makes the violin look nice and shinny, but that bridge just will not stay in place.
MACJR
Regulars
 Offline

Or you could do what some do. And make sure the bridges is in the right place, use a pencil and mark around the feet, the remove the bridge and scrape the varnish from the marked area, reinstall the bridge and not have to completely redo the whole violin.
With violins there is no fretting over the music.
Honorary advisor
Regulars
OldOgre said
Or you could do what some do. And make sure the bridges is in the right place, use a pencil and mark around the feet, the remove the bridge and scrape the varnish from the marked area, reinstall the bridge and not have to completely redo the whole violin.
That has crossed my mind, and I might even do that as a temporary solution, but in the long run, I do want to strip it down and refinish that violin. It looks nice enough, as it is, but I want to do a strip and refinish on a violin one of these days anyway. It is on my To Do list, and is one of the reasons I bought this cheap violin in the first place, to teach myself all sorts of violin customization and repair skills.
I have another violin, the Cecilio CVN-500, that looks nice, but the finish work was sloppy on it. It is not so bad that I want to risk making it my test project, but I do want to fix that violins finish someday. I would rather do a practice run first.
MACJR
1 Guest(s)


 Log In
 Register


